Safely Draining and Shutting Off Machine | Slayer Espresso Machines (V1-V3)
Sarah Dooley
Mar 03, 2020
If you plan to move your machine or are not planning to use it for longer than 3 days, we recommend shutting it down and draining all water in order to ensure that your machine and cafe are in good working condition when you return to full service. Please find the steps for safely draining and shutting off your Slayer Espresso Machine V1-V3.
Time Needed:
15-20 Minutes
Tools Needed:
1/2′ Wrench
7/16′ Wrench
Large Flathead Driver
Parts Needed:
2-5 pieces of 3′ 1/8” John Guest Tubing
Step 1: Turn off low voltage and high voltage switches below the machine.
Turn off water source to the machine.
Unplug main power from power source.
Open Steam Wands to dispense all steam pressure from the machine.
Step 2: Remove the cup tray and set aside.
Step 3: Remove the left side panel by unscrewing the top left, top right and bottom rear screws.
Rock the side panel back carefully and set aside.
Step 4: Remove the top front panel by removing the screws in the front of the machine and on top of the front panel, typically covered by the cup tray.
Lift the top front panel and disconnect the hot water switch Molex connecting the top front panel to the machine.
Set top front panel aside.
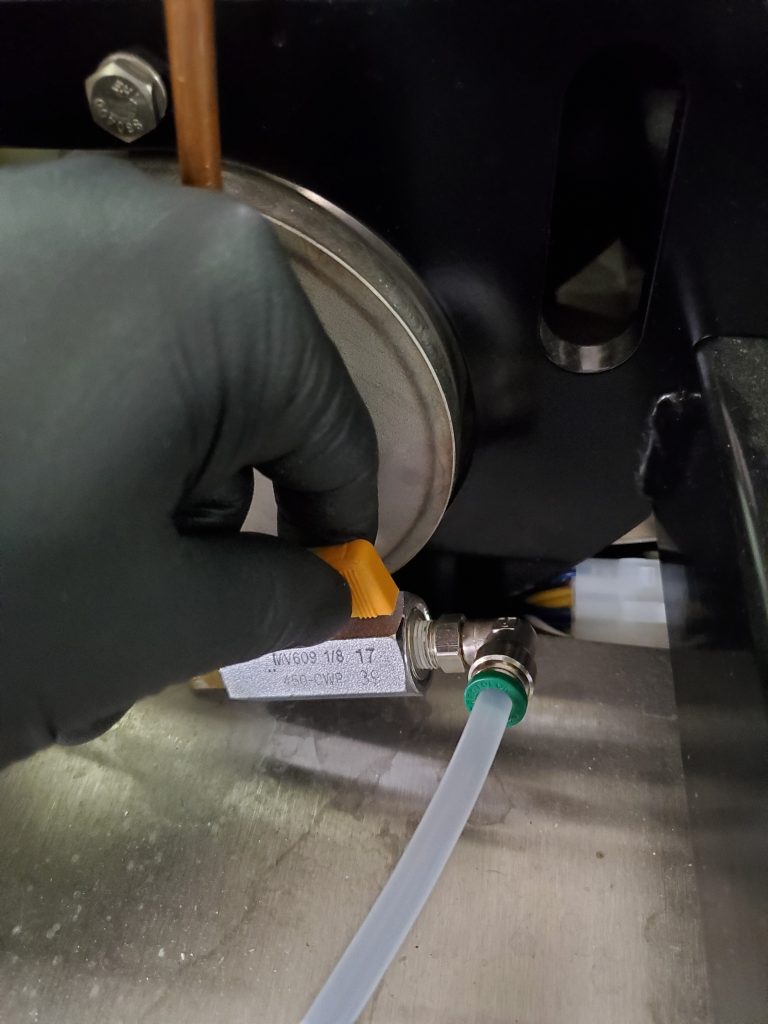
Step 5: Locate the ball valves dedicated to each brew tank, preheat and the steam tank.
Insert 1/8th John Guest tubing into each of the ball valves. Push the John Guest tubing in and pull, the tubing should not release.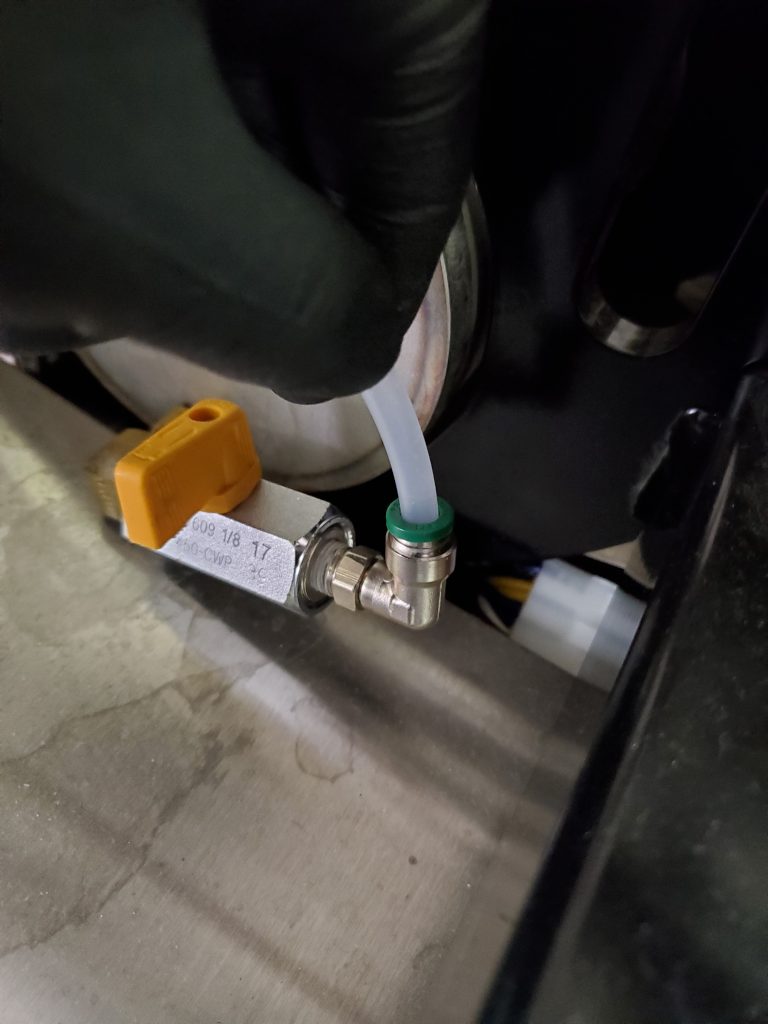
Step 6: Open the ball valve.
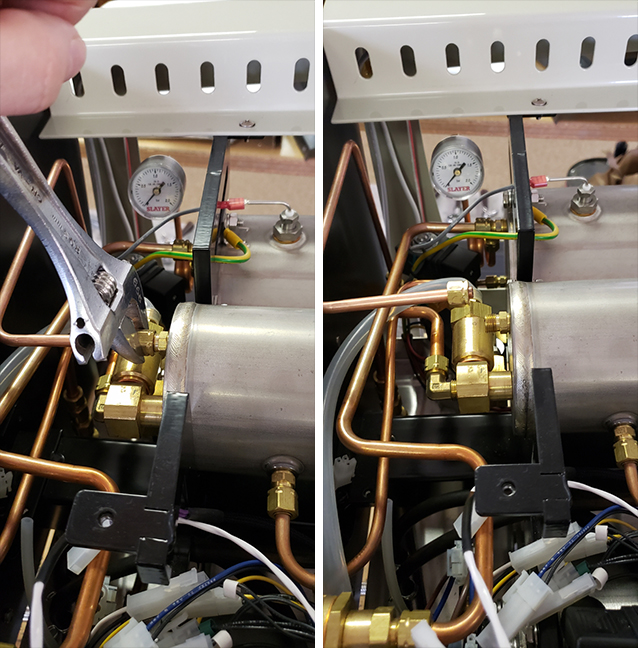
A vacuum needs to be broken in order for the preheat tanks to drain. To break the vacuum, please follow these instructions:
Step 7: Locate the copper tube to the left of the preheat tank.
Using a 1/2 wrench, remove the compression fitting and move copper tube.
A vacuum needs to be broken in order for the brew tanks to drain. To break the vacuum, please follow these instructions:
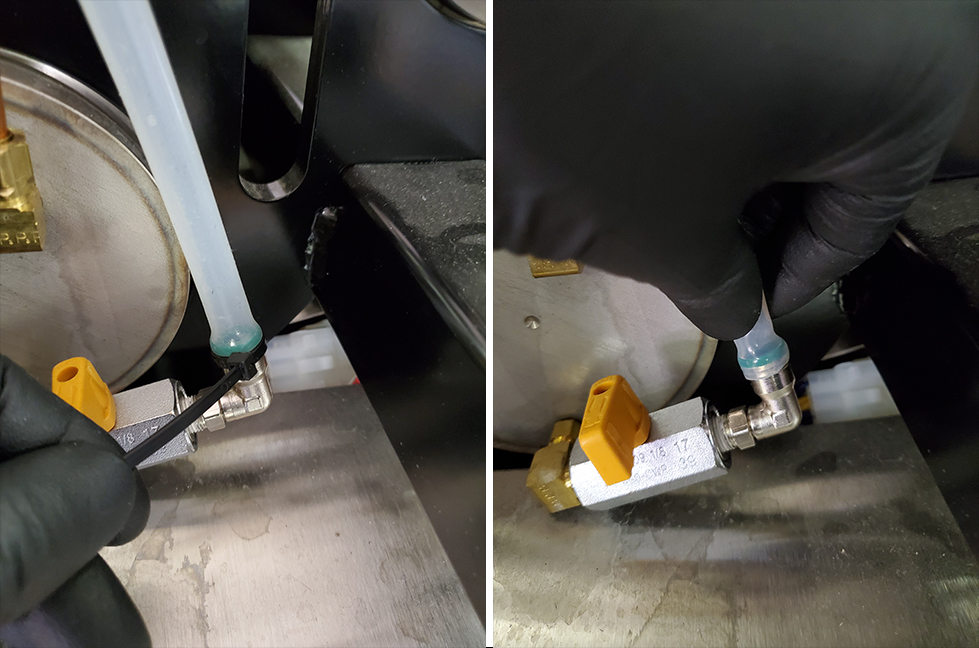
Step 8: Locate the brew gauge tube on the neck of the brew boiler.
Use a 7/16 wrench to undo the compression fitting.
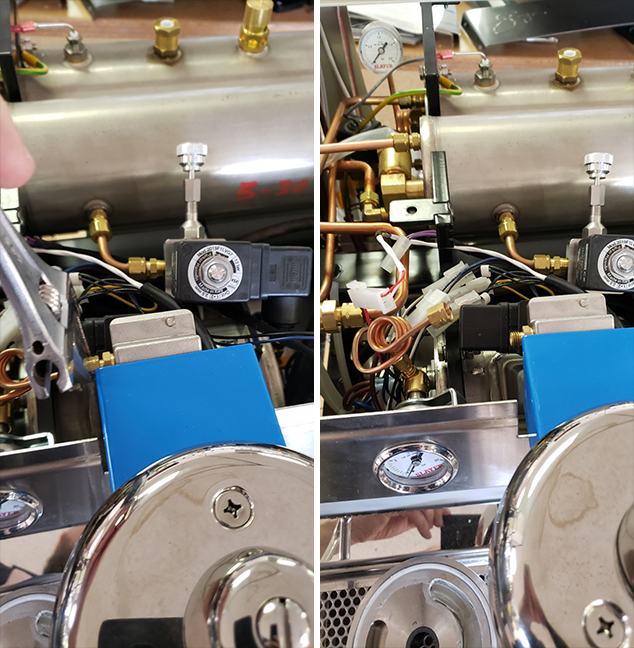
This will break the vacuum and allow the brew tank to drain.
If the John Guest fitting leaks, you can substitute draining by using a 5/16″ silicone tube.
Step 9: Once all tanks are drained, close ball valve on each tank. Use a wrench to push in the quick connect piece and remove the tubing.
Step 10: Tighten all compression fittings. Compression fittings should be tightened finger tight than a quarter turn using a wrench.
Step 11: Reassemble top front panel, side panel and drip tray.
Please contact Slayer with any questions or concerns at support@slayerespresso.com — we are here to help you and your machine.
SLAYER Corporate Headquarters
PHONE: +1 206.284.7171
707 Lind Ave SW, Renton, WA 98057